Motivation for drawing 12-point circle

Albrecht Duerer drew a version of the the following in his books instructing the art of perspective drawing. Consider a yellow Smiley Face with a green eye, and a red grin. To

ortho-duerer.png

An orthographic grid is superimposed on a given figure..

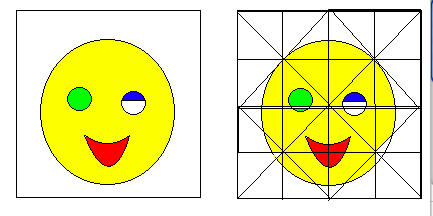
help the artist sketch Smiley in perspective. A square surrounding the figure is subdivided several times by first finding the midpoint of a square by crossing diagonals. Then drawing lines parallel to the sides.

To transfer this into perspective we start with a perspective square. Connecting corresponding pairs of points in the orthographic figure and in the perspective figure produces the line in perspective. Two lines cross at the point in perspecive, that their orthographics counterparts do. To draw parallels in perspective is even easier than orthographically because we connect vanishing points to midpoints of the squares.

persp-duerer.png

The same figure is drawn in perspective, using the grid as an aid.

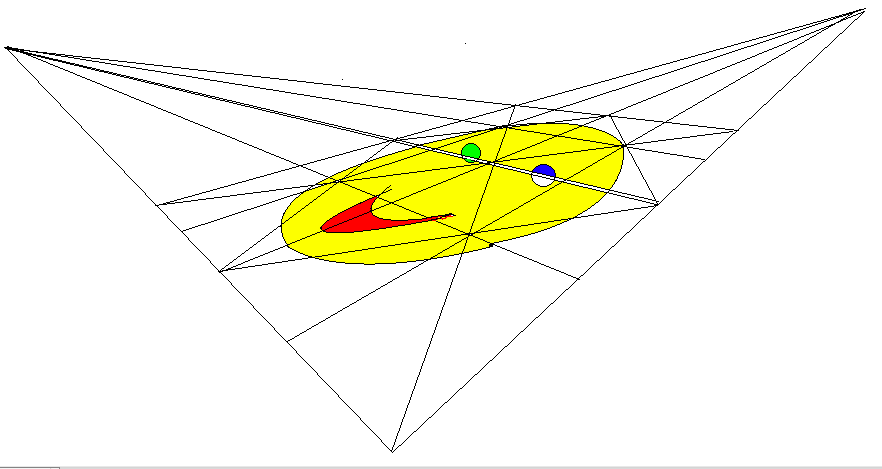
We now use the grid in perspective to locate places for the lines in the orthographics picture. The figures drawn here were not done in freehand, which would have been much easier. They were done in iPaint, in which curves are a bit tricky to do. Fortunately, iPaint has a zoom feature that allows you apply pixel level detail. A bonus is an easy way of coloring corresponding regions to help identifying correspondences.

You may note that Albrecht Duerer’s picture for how to use Alberti’s Veil for perspective drawing discussed earlier is an example of this process.

A missing contruction

The second lesson was a quick introduction to the notes on Measuring a Box. (See the Index to the Perspective section linked to the portal.) Step 3 needs a second elaboration for the construction using paper, pencil and gnomons (right angles, as with transparent triangle rulers or large pieces of rectangular paper, even a carpenter’s ell.) Here is the missing picture

thales-gnomons.png

The Thales triangles can be fitted to the extended altitudes of a 3pt perspective frame.

(Click image for download thales-gnomons.seg and open in KSEG.)

Given the three vanishing points, that form the triangle for a 3-point perspective frame, use the gnomon to "drop the perpendicular" from each vanishing point to the opposite horizon. Extend the altitudes beyond the horizons. Then use a gnomon (large enough right angle) to fit its right angle on the extended altitude, until its legs pass through the two vanishing points. That’s the Thales triangle for that horizon, at least approximately.

This method does avoid having to use a compass for bisecting, contructing perpendiculars, and fitting Thales triangles into semicircles.

Drawing exercise

As I summarized the lesson measurebox in the class notes, the students were worked from a box (nearly) in perspective on a piece of paper to complete the figure needed for measuring. You can download this template and print. To understand, you should make the construction twice, once with KSEG and again with pencil, paper and a gnomon (right-angle ruler).

measure-this-box.pdf